

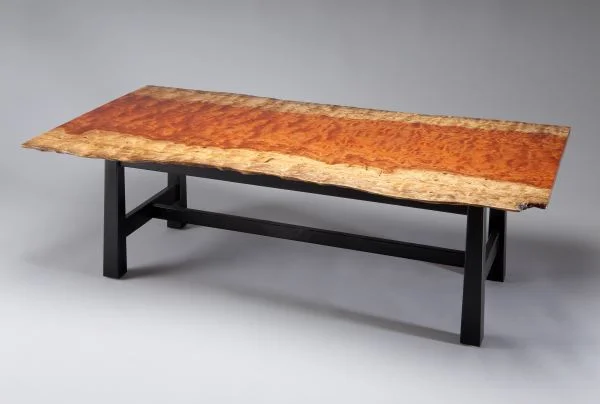
Preserving the beauty of problematic wood
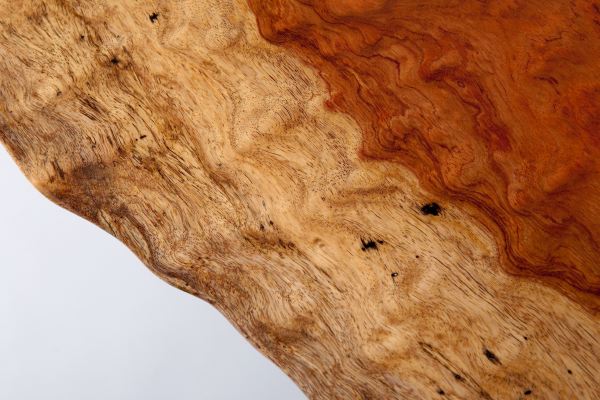
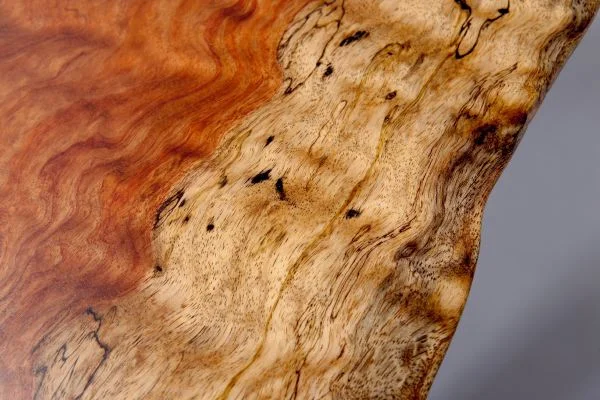
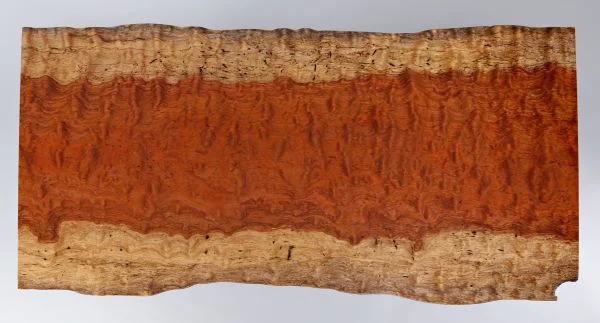

It’s no secret that the most beautiful woods are often the most challenging and difficult to work with. I ran into this head-on with a spectacular slab of live edge, highly figured Bubinga that I stumbled upon at Edensaw Woods.
It was the perfect size for a coffee table top, and I just couldn’t pass it by. Back at the shop, I examined the piece carefully and two things were immediately apparent. First, the grain patterns that contributed so much to the board’s beauty and character traveled every which way across and along the board, resulting in slight chipping and blowout where the different orientations of the wood fibers met the surface. Second, there was a fair amount of spalting in the sapwood along the live edges, some of which had developed cracking and checking and even a few spots exhibiting pre-rot characteristics.
My challenge: How to fill and stabilize the slab without detracting from its natural beauty.
After some head scratching and experimentation, I decided to use the same repair technique to address both problems. The board had, at some point, been run through a large thickness planer—undoubtedly contributing to some of the chipping—and was already as thin as I was comfortable with. I knew I couldn’t be too aggressive in working it flat and smooth, and approached with caution. I carefully flattened the high spots using a smoothing plane fitted with a slightly radiused blade to prevent square corners tearing the highly figured 1 grain, and followed up with a sharp card scraper. (Those things get HOT!) I then sanded with a 6” RO disc sander attached to a vacuum, using 80g and then 100g discs. (I didn’t go any finer at this point – I’ll explain why later.)
The final preparation step was to blow out any remaining sawdust and small pieces with compressed air. Now it was time for the secret weapon!

CA glue (cyanoacrylate adhesive) is a great woodworking resource. It’s not designed to be structural but is excellent for repairs. Unlike the all-purpose version sold in hardware and grocery stores as Super Glue or Crazy Glue, the type used for woodworking comes in different viscosities: thin (liquid for wicking deep into cracks and soaking into small soft spots); medium (gap-filling); and thick, (ultra-gap-filling). The cure time increases with the thickness, but spritzing it with an accelerator makes drying virtually instantaneous. There is a strong odor from the solvents and off-gassing, so be sure your work space is well ventilated.
Working carefully with the three different glue varieties, I was able to saturate, stabilize, and fill the various divots and cracks to a level slightly proud of the surface of the surrounding wood.
CA glue is hard and brittle when it’s dry, so I carefully sanded rather than scraped the repaired spots with 100g until they were flush, leaving the entire top sanded to a uniform 100g. I then finish sanded the entire top, progressing gradually from 100 through 280g. Periodic checking of the surface with a painter’s light during the process helped to identify any areas that needed more attention.
After the sanding was completed I applied eight coats of rub-on satin oil polyurethane finish, breaking the dry surface lightly 2 with 400g paper between coats. All evidence of the CA glue repairs completely disappeared with the application of the finish, leaving only the grain of the wood showing through.
The divots, craters, defects and sharp fiber grain ends were now smooth, flat and even. It was hard, painstaking work, but definitely worth the effort! I was able to save a piece of wood with serious problems that could easily have been a reject, and use it to create a thing of beauty. It remains one of my favorite tables.